


How to Create and Replace the NSX Manager Web, API, and APH-AR Certificates using PowerShell
- Feb 24, 2023
- 3 min read
I recently resetup NSX in my home lab. I setup NSX 4.0.1.1. After completing the appliance stand up, we need to create/install a certificate for the NSX Manager Web Interface. This is based on my VMware Explore 2020 presentation:
Prereqs
Install Notepad++ or another code editor to view PS1 and Log files. You will also need an API utility. I will be using PostMan.
Step 1
Go to my GitHub and download the PowerShell Scripts to generate the NSX web certificate with: https://github.com/butch7903/VMwareCertificates

Step 2
Create a folder at the root of C called certs, place the zip bundle there and and explode it. You will need the Root and Intermediate PS1 along with all the NSX-T PS1 files.

Step 3
Edit the Generate Root and Intermediate PS1 file. You will need to update the names of the Rootmatch and Intermediatematch variables. Close the Script and then run it. This will generate the root and intermediate certificates in the correct format for NSX

Step 4
Edit the NSX-T Manager VIP Certificate PS1 File. You will need to update all of the variables with the correct information, save it, and then run the PS1 script. It is recommended that you have the DNS entry created for the VIP prior to installation.

Step 5
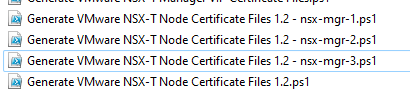
Copy the Generate VMware NSX-T Node Certificate Files 1.2 PS1 file 3x. Name each file the name of each NSX Manager, then edit each files variables information, save it, and then run the PS1 script for each NSX Manager.

Step 6
Login to NSX Manager > System > Certificates > Click on Import Certificate

Step 7
Input the Name of the NSX Manager VIP (start with this cert first), Turn off Service Certificate, Click on Browse for Certificate, Select the nsx-mgr-sslCertificateChain.pem file, Click on Browse for Private Key, Select the nsx-mgr.key, and Click Save

Step 8
Repeat Steps 6-7 for all NSX Manager Node Certificates.

Step 9
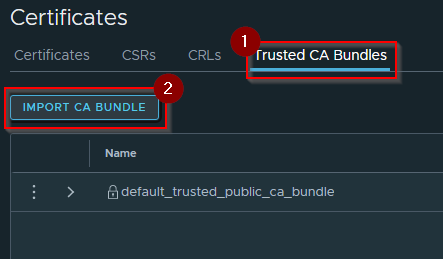
Click on Trusted CA Bundles > Import CA Bundle
Step 10
Type in the name of your CAs for Name, Browse for the Certificate. This will be the combined CA PEM File (CombinedCA_HAMCA01-CA-PEM.pem), and Click Save

Use PostMan to Change your Certificates
This is based on the the replace certifications documentation from VMware found below.
Step 1
Open PostMan, Click on Collections > New NSX-T

Step 2
Click on New

Step 3
Click on Authorization, Select Type Basic Authentication, Type in the Username and Password

Step 4
Select Post

Step 5
Login to NSX Manager > System > Certificates. Document the IDs of all the certificates you imported earlier.

Step 6
Copy the below API Call and modify it for your use. This API call is to be used with the NSX VIP Certificate/IP. You will need to replace the <nsx-mgr> and <VIP-Cert-ID> areas with the right info
https://<nsx-mgr>/api/v1/trust-management/certificates/<VIP-Cert-ID>?action=apply_certificate&service_type=MGMT_CLUSTER

Step 7
Click on Send. If Status 200 OK is returned, it was successful!

Step 8
Test the new certificate by browsing to it. If it shows up secure, you did your job correctly! (You may want to test with incognito mode to validate this properly)

Step 9
Clone the Post NSX VIP Entry, call it NSX Get Nodes
API Call will be like below. Please update it with your NSX manager name.
https://<nsx-mgr>/api/v1/cluster/nodes


Step 10
Document the Node IDs and IPs for each Node and corrorlate that with the Node's Certificate ID

Note you can also get the Node IDs from the Certificates area under where used.

Step 11
Repeat steps 2-5 using below API call to replace the certificates for the NSX Manager Nodes.
POST https://<nsx-mgr>/api/v1/trust-management/certificates/<Node-Cert-ID>?action=apply_certificate&service_type=API&node_id=<Node-ID>

Step 12
Validate in NSX that the certificates have been replaced.
Step 13
Repeat Steps 2-5 for all nodes to replace the APH Certificate for the NSX Manager Nodes.
POST https://<nsx-mgr>/api/v1/trust-management/certificates/<Node-Cert-ID>?action=apply_certificate&service_type=APH&node_id=<Node-ID>

Step 14
After Validation of a Certificates in the NSX Manager Certificate interface (note you may have to refresh this screen manually), you can clean up the unused self-signed certificates. Delete the certificates that are no longer used.


Comments